Category: How To Design

  • DIY Budget Home Projects  Transforming Houses Affordably

    DIY Budget Home Projects Transforming Houses Affordably

    The allure of a beautifully renovated home often clashes with the stark reality of professional renovation costs. However, a burgeoning movement empowers homeowners: DIY budget home projects. This approach leverages ingenuity and readily available resources to achieve stunning transformations, significantly reducing expenses while fostering a sense of personal accomplishment. The science of efficient material use and clever design principles becomes your ally, turning potential frustrations into rewarding experiences.

    From repainting walls to upcycling furniture, the possibilities are as vast as your creativity.

    This guide delves into the practical aspects of various DIY projects, providing step-by-step instructions and cost-effective solutions. We’ll explore the essential tools and materials needed, examine efficient painting techniques that minimize waste, and uncover the secrets to upcycling and repurposing furniture to create unique, personalized spaces. We’ll also tackle simple home repairs, budget-friendly landscaping, and clever organization strategies, all while emphasizing cost savings and environmental consciousness.

    By understanding the basic principles of home improvement, coupled with a dash of creativity, you can achieve remarkable results without breaking the bank.

    Introduction to DIY Budget Home Projects
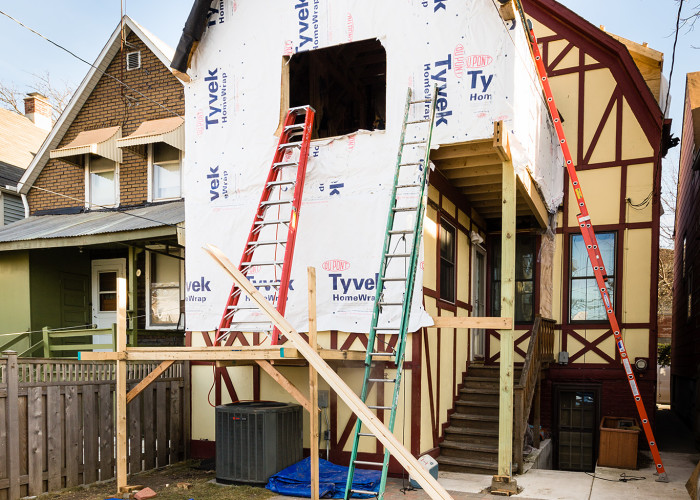
    DIY budget home projects

    The allure of DIY home improvement projects on a budget stems from a potent combination of financial savings and personal fulfillment. For many homeowners, the prospect of transforming their living spaces while simultaneously controlling costs and gaining valuable hands-on experience is incredibly appealing. This approach allows for greater creativity and customization, resulting in a home that truly reflects the owner’s personal style and needs, often exceeding the limitations of pre-packaged solutions.

    Furthermore, the satisfaction derived from successfully completing a project is a significant motivator, fostering a sense of accomplishment and pride.The potential cost savings associated with DIY versus hiring professionals can be substantial, often exceeding 50% depending on the project’s complexity and the prevailing hourly rates for skilled labor in a given region. For instance, repainting a single room might cost hundreds of dollars if outsourced, whereas purchasing paint and supplies independently could reduce the expense to a fraction of that cost.

    Similarly, simple repairs like fixing a leaky faucet or replacing a broken light switch, tasks easily managed by a moderately handy individual, can avoid costly service calls. The savings are not only financial; time management also becomes a factor, allowing homeowners to schedule projects according to their availability, rather than being constrained by the schedules of contractors.

    Essential Tools and Materials for Common DIY Projects

    The tools and materials required for common DIY projects vary greatly depending on the specific task. However, a basic toolkit provides a strong foundation for tackling numerous home improvement challenges. Properly maintaining these tools extends their lifespan and enhances the safety and efficiency of each project. Investing in quality, even if it means acquiring them gradually, is often more cost-effective in the long run.

    Category Tool/Material Purpose Notes
    Measuring & Marking Measuring Tape Accurate measurement of spaces and materials. Choose a tape measure with a locking mechanism for ease of use.
    Measuring & Marking Level Ensuring surfaces are perfectly horizontal or vertical. A bubble level is sufficient for most home projects.
    Fastening Screwdriver Set (Phillips and Flathead) Driving and removing screws. Consider a magnetic tip for improved control.
    Fastening Hammer Driving nails and other fastening tasks. Choose a claw hammer for easier nail removal.
    Cutting Utility Knife Cutting various materials like cardboard, rope, and some plastics. Always use caution when handling sharp blades.
    Cutting Hand Saw Cutting wood for smaller projects. Select a saw with appropriate teeth for the type of wood being cut.
    Safety Safety Glasses Protecting eyes from flying debris. Essential for all DIY projects involving power tools or hammering.
    Safety Work Gloves Protecting hands from cuts, scrapes, and splinters. Choose gloves appropriate for the task; leather gloves offer better protection than cloth gloves.
    General Putty Knife Applying and smoothing putty, scraping paint. A flexible blade is helpful for various applications.
    General Duct Tape A versatile adhesive for temporary repairs and securing materials. Choose a high-quality duct tape for better adhesion and durability.

    Painting and Decorating on a Budget

    DIY budget home projects

    Transforming your home’s aesthetic needn’t break the bank. With careful planning and the application of a few key techniques, you can achieve a stunning, refreshed look without excessive expenditure. This section details budget-friendly painting and decorating strategies, focusing on practicality and efficiency.

    Beginner-Friendly Painting Techniques

    Choosing the right painting technique significantly impacts both the final look and the time invested. For beginners, simplicity and ease of application are paramount. Three techniques stand out for their accessibility and impressive results.

    • One-Stroke Painting: This technique uses a single, loaded brushstroke to apply paint, creating a smooth, even finish. It’s ideal for large, flat surfaces and minimizes brush marks. The key is to use a high-quality brush that holds a generous amount of paint and to practice maintaining a consistent stroke pressure.
    • Sponge Painting: Sponge painting offers a textured, subtly uneven finish, perfect for adding visual interest to walls or creating a unique effect on furniture. Different sponge types and application techniques (dabbing, rolling, dragging) yield diverse results. Experimentation is key to finding the perfect look.
    • Dry Brushing: This technique involves using a dry brush with a minimal amount of paint to create a distressed or aged look. It’s excellent for adding texture and depth to walls or furniture, providing a rustic or vintage aesthetic. The amount of paint on the brush directly impacts the final effect.

    Wall Preparation for Painting

    Proper wall preparation is crucial for a professional-looking finish. Neglecting this step often leads to uneven paint application, poor adhesion, and a shorter lifespan for your paint job. The process involves several key steps.

    1. Surface Cleaning: Begin by thoroughly cleaning the walls to remove dust, dirt, cobwebs, and any loose debris. A damp cloth or sponge is usually sufficient. For stubborn stains, a mild detergent solution may be necessary. Allow the walls to dry completely before proceeding.
    2. Patching Imperfections: Inspect the walls for holes, cracks, or other imperfections. Use spackling paste or joint compound to fill these areas, allowing them to dry completely before sanding smooth. This ensures a flawless, even surface for painting.
    3. Priming (if necessary): Priming is essential for surfaces that are porous, stained, or previously painted with a drastically different color. Primer provides a uniform base for the topcoat, ensuring better adhesion and color consistency. Choose a primer appropriate for the surface type and existing paint.
    4. Sanding: Once the patching compound is dry, lightly sand the repaired areas to create a smooth surface. Remove any dust with a tack cloth or soft brush before painting.

    Cost-Effective Living Room Color Scheme

    Color psychology plays a significant role in shaping the atmosphere of a room. A well-chosen color scheme can enhance the feeling of spaciousness, promote relaxation, or energize the space. For a budget-friendly living room, consider these options:

    • Walls: A soft, neutral shade like “Agreeable Gray” (Sherwin-Williams) creates a calming and versatile backdrop. Its slightly cool undertones prevent it from feeling too sterile. This allows for greater flexibility in furniture and accessory choices.
    • Accent Wall: Introduce a pop of color with a single accent wall painted in a complementary shade. A muted teal or a warm, earthy terracotta can add visual interest without overwhelming the space. For instance, a terracotta accent wall can bring a sense of warmth and comfort, while a teal accent wall can add a touch of serenity and sophistication.

    • Trim: Maintain a cohesive look by painting the trim in a slightly lighter shade of the wall color or a crisp white. This creates a clean, defined look that enhances the overall aesthetic.

    Efficient Room Painting Technique to Minimize Waste

    Efficient painting minimizes both time and material waste. Careful planning and execution are key.

    1. Accurate Measurement: Precisely measure the area to be painted to determine the required amount of paint. Most paint manufacturers provide coverage estimates per gallon or liter. This prevents overbuying and reduces waste.
    2. Proper Preparation: Thorough preparation, as detailed above, is crucial. Addressing imperfections beforehand reduces the need for touch-ups and prevents wasted paint from uneven application.
    3. Cutting In: Begin by “cutting in”—painting the edges of the walls and around windows and doors with a brush. This ensures a neat and precise finish before rolling. Use small amounts of paint on your brush to prevent drips and wasted paint.
    4. Rolling Technique: Use a roller with a nap suitable for the wall texture. Apply paint in “W” or “M” patterns, overlapping each stroke slightly to ensure even coverage. This avoids streaking and ensures optimal paint distribution.
    5. Paint Storage: Properly seal leftover paint to prevent it from drying out. This allows for future touch-ups or use in other projects.

    Upcycling and Repurposing Furniture

    Upcycling and repurposing furniture offers a sustainable and cost-effective way to refresh your home décor while reducing waste. This process involves transforming old, unwanted furniture into functional and aesthetically pleasing pieces, breathing new life into items that might otherwise end up in landfills. The principles of upcycling leverage the existing structure and materials, minimizing environmental impact and maximizing resource utilization.

    This approach not only saves money but also allows for creative expression and the development of unique, personalized furniture.

    Examples of Easily Upcycled Furniture

    Many common household furniture items are prime candidates for upcycling. Wooden chairs, with their sturdy construction, are easily refinished with paint or stain. Dressers, offering ample surface area and storage, can be transformed with new hardware, paint, and decoupage techniques. Coffee tables, side tables, and even old headboards can be given new life through sanding, painting, and the addition of decorative elements.

    The key is to select pieces with sound structural integrity, focusing on cosmetic improvements rather than extensive structural repairs.

    Refinishing a Wooden Chair: A Step-by-Step Guide

    Refinishing a wooden chair involves a straightforward process that yields impressive results. First, the chair must be thoroughly cleaned to remove dirt, dust, and any existing finishes. This is best accomplished using a stiff brush and a mild detergent solution. Next, the surface needs to be sanded using progressively finer grit sandpaper (starting with a coarser grit, such as 80, and moving to a finer grit, such as 220) to smooth out any imperfections and create a surface suitable for paint adhesion.

    This sanding process removes old varnish or paint, revealing the natural wood grain. After sanding, the chair should be primed with a high-quality wood primer, ensuring even coverage and preventing the wood from absorbing the topcoat unevenly. Once the primer is dry, the chair can be painted with the desired color, using multiple thin coats for optimal coverage and a smooth finish.

    Allow ample drying time between coats. Finally, a sealant can be applied to protect the finish and add durability. The entire process, from start to finish, typically takes a few days, depending on drying times.

    Transforming an Old Dresser into a Unique Storage Solution

    An old dresser, often overlooked or discarded, can be transformed into a striking and functional storage solution. The process begins with cleaning and sanding the dresser, similar to the chair refinishing process. Once the surface is prepared, the dresser can be painted or stained, allowing for creative choices in color and finish. New hardware, such as knobs or pulls, can drastically change the dresser’s aesthetic, adding a personalized touch.

    Decoupage techniques, involving the application of decorative paper or fabric, can add intricate designs and patterns. Adding interior dividers or repurposing drawers for specialized storage (such as jewelry or craft supplies) further enhances functionality. Consider adding LED lighting inside drawers for a modern touch. A simple transformation can turn a drab, outdated dresser into a stylish and practical piece of furniture.

    Repurposing Old Jars and Cans into Decorative Items

    Empty glass jars and metal cans, often destined for the recycling bin, can be easily repurposed into charming decorative items. Clean and dry glass jars can be painted, decoupaged, or used as vases for flowers or small plants. Metal cans, after thorough cleaning and removal of sharp edges, can be painted and used as planters, pencil holders, or even candle holders.

    The possibilities are limited only by creativity. For instance, small jars can be filled with colorful sand, beads, or dried flowers, creating miniature terrariums. Larger cans can be transformed into unique lampshades by adding a light fixture inside. This simple repurposing reduces waste and allows for the creation of personalized decorative accents.

    Simple Home Repairs and Improvements

    Tackling minor home repairs and improvements not only saves money but also empowers homeowners to maintain and enhance their living spaces. These projects, often manageable with basic tools and readily available materials, can significantly impact comfort, efficiency, and property value. Understanding the underlying principles of these repairs allows for effective and safe execution.

    Leaky Faucet Repair

    A dripping faucet, besides being annoying, wastes water and money. The process of fixing a leaky faucet involves identifying the type of faucet (compression, cartridge, ball, or ceramic disc) and sourcing the appropriate replacement parts. Generally, the repair involves turning off the water supply, disassembling the faucet, replacing worn-out O-rings, washers, or cartridges, and reassembling the faucet, ensuring proper water flow and tightness.

    For example, a compression faucet repair often requires replacing worn-out washers; a cartridge faucet may need a new cartridge. The specific steps vary depending on the faucet type, but the fundamental principle is to replace the damaged components responsible for sealing the water flow. Improperly tightened components can lead to leaks, while over-tightening can damage the faucet.

    Drywall Hole Patching

    Small holes in drywall, often resulting from accidental impacts or removed fixtures, are easily repairable. The process starts with cleaning the area around the hole, removing any loose debris. Next, a suitable patching compound is applied, typically using a putty knife to fill the hole and create a smooth surface. Once the patch dries, it’s sanded smooth to blend seamlessly with the surrounding wall.

    Finally, the patched area is primed and painted to match the existing wall color. For larger holes, a piece of drywall might need to be cut and installed, followed by the same patching, sanding, and painting process. The key is to use enough patching compound to fill the hole completely without creating excess buildup that requires extensive sanding.

    Light Switch Replacement

    Replacing a broken light switch is a straightforward electrical task, but safety precautions are paramount. Before starting, turn off the power to the circuit at the breaker box. This is crucial to prevent electrical shock. The old switch is then removed, usually by loosening screws and carefully pulling it out of the electrical box. The new switch is wired in, matching the wires to their corresponding terminals, typically marked with screws or push-in connectors.

    The switch is then secured in the electrical box and the cover plate is reattached. The power is then restored to the circuit, and the switch is tested. Incorrect wiring can lead to malfunction or electrical hazards, so careful attention to wire connections is essential.

    Home Insulation Improvement

    Improving home insulation reduces energy loss, lowering heating and cooling costs. Affordable methods include adding weather stripping around doors and windows to seal air gaps. Caulk can similarly seal gaps around window frames and baseboards. Insulating attics and crawl spaces with readily available insulation rolls or batts is another effective measure. For exterior walls, adding rigid foam insulation panels to the exterior can improve insulation.

    These methods are effective because they reduce the transfer of heat between the inside and outside of the home. For example, a well-insulated attic can reduce heat loss in winter and heat gain in summer, leading to lower energy bills. The effectiveness of insulation is measured by its R-value, a higher R-value indicating better insulation.

    Budget-Friendly Landscaping and Gardening

    DIY budget home projects

    Transforming your outdoor space into a vibrant and inviting haven doesn’t require a hefty budget. By employing strategic planning and utilizing readily available resources, you can create a beautiful and functional landscape that thrives without breaking the bank. This section explores practical techniques and cost-effective solutions for achieving a flourishing garden, focusing on low-maintenance practices and resourcefulness.

    Creating a Low-Maintenance Garden Using Native Plants

    Selecting native plants offers a multitude of benefits for budget-conscious gardeners. Native species are naturally adapted to the local climate and soil conditions, requiring less water, fertilizer, and pesticides compared to non-native plants. This reduces ongoing maintenance costs and environmental impact. Furthermore, native plants often attract beneficial insects and pollinators, contributing to a healthier ecosystem in your garden.

    Consider researching your region’s native flora to identify species suitable for your specific sunlight and soil conditions. For instance, in arid regions, succulents and drought-tolerant grasses thrive with minimal intervention. In wetter climates, selecting native shade-loving plants like ferns or hostas can create a lush and low-maintenance environment. The key is to choose plants that naturally fit within your local ecosystem, reducing the need for artificial interventions.

    Building a Simple Raised Garden Bed Using Recycled Materials

    Raised garden beds offer several advantages, including improved drainage, better soil control, and increased accessibility. Instead of purchasing expensive lumber, repurpose readily available materials to construct your raised beds. Pallets, reclaimed wood, or even large plastic containers can be utilized to create functional and aesthetically pleasing structures. For example, repurposed pallets, once cleaned and treated, can form the framework for a rustic-looking raised bed.

    Ensure the wood is treated to prevent rot and decay. Similarly, large plastic containers, such as those used for storing food or other goods, can be arranged to create modular raised beds. Remember to line the interior of the containers with landscape fabric to prevent soil from leaching out. This approach minimizes material costs and promotes sustainable gardening practices.

    Propagating Plants from Cuttings

    Plant propagation from cuttings is a highly cost-effective method for expanding your garden without constantly purchasing new plants. Many common garden plants, including herbs, shrubs, and even some flowering plants, can be easily propagated from stem cuttings. The process involves taking a healthy stem cutting, treating it with rooting hormone (optional but beneficial), and planting it in a suitable medium such as potting mix or vermiculite.

    Maintaining consistent moisture levels is crucial for successful propagation. Once roots develop, the new plant can be transplanted into your garden or into larger containers. This technique allows for the expansion of your garden at a fraction of the cost associated with purchasing new plants. For example, propagating herbs like rosemary or lavender allows for easy expansion of these fragrant plants without needing to constantly buy new seedlings.

    Low-Cost, Drought-Tolerant Plants Suitable for Various Climates

    Choosing drought-tolerant plants significantly reduces water consumption and maintenance requirements. The selection will vary depending on the climate.

    • Arid/Mediterranean Climates: Lavender, Rosemary, Thyme, Sedum, Yucca
    • Temperate Climates: Coneflowers, Black-eyed Susans, Daylilies, Russian Sage, Perovskia
    • Subtropical/Tropical Climates: Lantana, Bougainvillea, Plumbago, Hibiscus (certain varieties)

    Note: Always check the specific water requirements for any plant you choose, as even drought-tolerant varieties may need occasional watering, especially during establishment. Local nurseries can provide valuable advice on plants best suited for your specific microclimate.

    Organizing and Decluttering on a Budget

    DIY budget home projects

    Effective organization and decluttering significantly enhance the functionality and aesthetic appeal of any living space, particularly in smaller homes. The psychological benefits are also substantial, reducing stress and improving focus. Surprisingly, achieving a clutter-free environment doesn’t necessitate expensive storage solutions; creativity and resourcefulness are key. This section explores practical strategies for decluttering and organizing on a budget, utilizing readily available materials and repurposed items.

    Decluttering Small Spaces Without Purchased Storage

    The principle of decluttering hinges on the Pareto principle, also known as the 80/20 rule. This suggests that 80% of our problems stem from 20% of our possessions. Therefore, identifying and eliminating that 20% is paramount. Begin by meticulously sorting through belongings, categorizing items into three piles: keep, donate/sell, and discard. For small spaces, ruthless elimination is crucial.

    Donating or selling unwanted items not only clears space but also potentially generates funds for future projects. Discarding truly unnecessary items reduces waste and minimizes clutter. The process should be systematic and thorough, focusing on functionality and sentimental value.

    Benefits of Repurposed Containers for Storage

    Repurposing containers offers several advantages beyond cost savings. Using existing containers reduces waste, aligning with environmentally conscious practices. Furthermore, repurposed containers often possess unique aesthetics, adding character and charm to the organized space. For instance, old jars can become spice racks, while attractive tins can store stationery or craft supplies. Cardboard boxes, when covered with decorative paper or fabric, transform into stylish storage solutions.

    This method allows for personalization and customization, tailoring storage solutions to individual needs and preferences. The inherent variability of repurposed containers fosters creative problem-solving and reduces reliance on standardized, often expensive, storage systems.

    Organizing Kitchen Cabinets and Drawers Using Readily Available Materials

    Efficient kitchen organization maximizes space and streamlines daily routines. Utilizing readily available materials like cardboard dividers, repurposed shoe boxes, and even empty plastic containers can significantly improve organization. For instance, cardboard dividers, cut to fit cabinet shelves, separate plates, bowls, and cups, preventing stacking and improving accessibility. Shallow drawers can be organized using repurposed shoe boxes, lined with fabric or paper for a more aesthetically pleasing look.

    Empty plastic containers, labeled clearly, can store spices, pasta, or other dry goods, enhancing visibility and accessibility. This approach promotes efficient use of vertical space, making the most of limited cabinet and drawer space.

    Creating a Functional and Aesthetically Pleasing Home Office Space Using Affordable Solutions

    A productive home office doesn’t require extravagant expenditures. Repurposing existing furniture, such as a sturdy dining table or a repurposed dresser, can serve as a functional desk. Shelving can be created using inexpensive brackets and planks of wood, offering customizable storage solutions. Mason jars or repurposed tins can be used to organize pens, pencils, and other office supplies.

    A simple, inexpensive desk lamp provides adequate task lighting. By prioritizing functionality and incorporating creative storage solutions, a productive and aesthetically pleasing home office can be achieved without exceeding a budget. This approach emphasizes practicality and resourcefulness, demonstrating that a productive workspace can be created using readily available, affordable materials.

    Visual Guide to DIY Projects

    This section provides detailed, step-by-step instructions and visual descriptions for two common DIY home projects: building a simple bookshelf and creating custom window treatments. These projects utilize readily available materials and require minimal specialized tools, making them accessible to beginners. The focus is on practicality, affordability, and achieving an aesthetically pleasing result.

    Simple Bookshelf Construction

    Building a simple bookshelf is a foundational DIY project that introduces fundamental woodworking techniques. This project utilizes standard lumber readily available at most hardware stores. The dimensions provided can be easily adjusted to suit individual needs and available space. The final product will be a sturdy, functional bookshelf with a clean, minimalist aesthetic.The following materials are required: Three 1x12x8 foot boards for shelves, two 2x4x8 foot boards for sides, wood screws (2.5 inch), wood glue, sandpaper (various grits), wood stain or paint (optional).Construction Steps:

    1. Cut the 1×12 boards into three equal lengths (approximately 2.67 feet each) to create the shelves. Use a miter saw for precise cuts; a hand saw can also be used, but requires more skill and care.
    2. Cut the 2×4 boards into two pieces, each 3 feet tall. These will serve as the sides of the bookshelf. Again, a miter saw is recommended for clean, accurate cuts.
    3. Apply wood glue to the ends of the shelf boards and position them evenly spaced on the inside of the 2×4 side supports. Secure them using wood screws, ensuring the screws are countersunk slightly to avoid protruding above the surface.
    4. Sand all surfaces smoothly using sandpaper, starting with a coarser grit and progressing to a finer grit for a polished finish. Pay particular attention to the screw heads.
    5. Apply wood stain or paint (optional) to enhance the appearance and protect the wood. Follow the manufacturer’s instructions for application and drying time.

    Visual Description: The finished bookshelf will be a simple, rectangular structure. The three shelves will be evenly spaced within the frame formed by the two 2×4 side supports. The clean lines and unadorned design offer a minimalist aesthetic. The stain or paint will add color and enhance the visual appeal, creating a piece that complements various interior design styles.

    The sturdy construction ensures the bookshelf can safely hold a considerable amount of books or other items.

    Custom Window Treatment Creation

    Creating custom window treatments allows for personalization and cost savings compared to purchasing ready-made options. This project uses inexpensive fabrics and basic sewing skills to produce a functional and aesthetically pleasing window covering. The finished product will offer light filtering capabilities, enhancing privacy and controlling the amount of natural light entering the room.Materials: Fabric (enough to cover the window plus seam allowance), lining fabric (optional), curtain rod, curtain rings, sewing machine (or needle and thread), measuring tape, scissors, iron and ironing board.Construction Steps:

    1. Measure the window carefully to determine the required fabric dimensions. Add extra fabric for seams and hems. Accurate measurements are crucial for a proper fit.
    2. Cut the fabric according to the measurements, ensuring straight edges. If using lining fabric, cut a piece of the same size.
    3. Sew the lining fabric to the main fabric (if using), creating a double layer for added durability and light blocking. This step is optional, depending on the desired level of light filtering.
    4. Hem the edges of the fabric to prevent fraying. This can be done by hand or with a sewing machine. A simple hem will suffice.
    5. Attach curtain rings to the top edge of the fabric. These rings will allow the curtain to slide easily along the curtain rod.
    6. Hang the completed curtain on the curtain rod.

    Visual Description: The finished window treatment will be a simple panel of fabric hanging from a curtain rod. The texture of the fabric will be prominent, contributing to the overall aesthetic. The light filtering capabilities will depend on the type of fabric used; sheer fabrics will allow diffused light to pass through, while heavier fabrics will provide more privacy and block more light.

    The color and pattern of the fabric can be chosen to complement the room’s decor. The simplicity of the design allows the fabric’s texture and color to take center stage.

    Final Conclusion

    Embarking on DIY budget home projects is not merely about saving money; it’s about reclaiming control over your living space and fostering a deeper connection with your home. By mastering simple techniques and employing creative problem-solving, you can transform your environment into a reflection of your personal style and resourcefulness. Remember, every successful project, from a freshly painted wall to a repurposed piece of furniture, is a testament to your ingenuity and a step towards a more personalized, aesthetically pleasing, and financially responsible home.

    The journey may present challenges, but the rewards – both tangible and intangible – are immeasurable.

    Questions and Answers

    What are the biggest potential pitfalls of DIY home projects?

    Underestimating time and materials needed, lacking essential skills leading to mistakes, and compromising safety are common pitfalls. Thorough planning and research are crucial.

    How can I ensure the safety of my DIY projects?

    Prioritize safety by using appropriate personal protective equipment (PPE) like gloves and eye protection, following manufacturer instructions for tools and materials, and knowing your limitations. Don’t hesitate to seek professional help for complex or potentially dangerous tasks.

    Where can I find affordable materials for my projects?

    Thrift stores, online marketplaces, salvage yards, and even your own recycling bin can be treasure troves of affordable materials. Consider repurposing and upcycling before purchasing new items.

    How do I determine if a DIY project is beyond my skill level?

    Start with simpler projects to build confidence. If a project involves complex plumbing, electrical work, or structural modifications, consult a professional to avoid costly mistakes or safety hazards.

    What are some resources available to help me with DIY projects?

    Numerous online tutorials, instructional videos, and home improvement websites and blogs offer guidance. Local libraries often have books and resources on DIY projects as well.
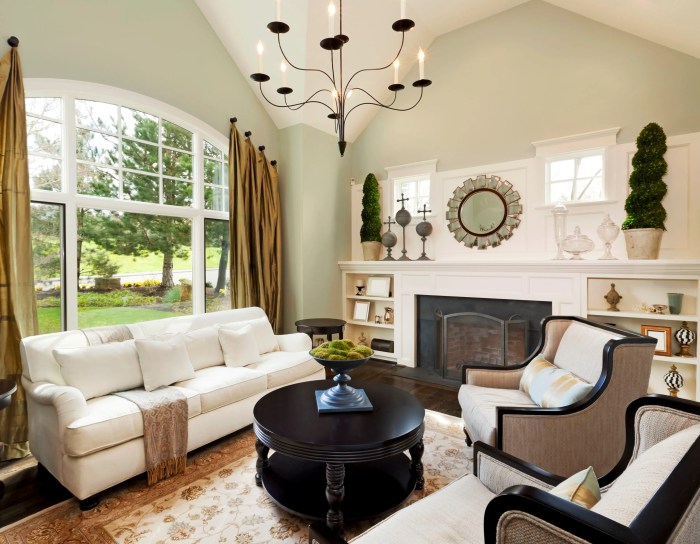
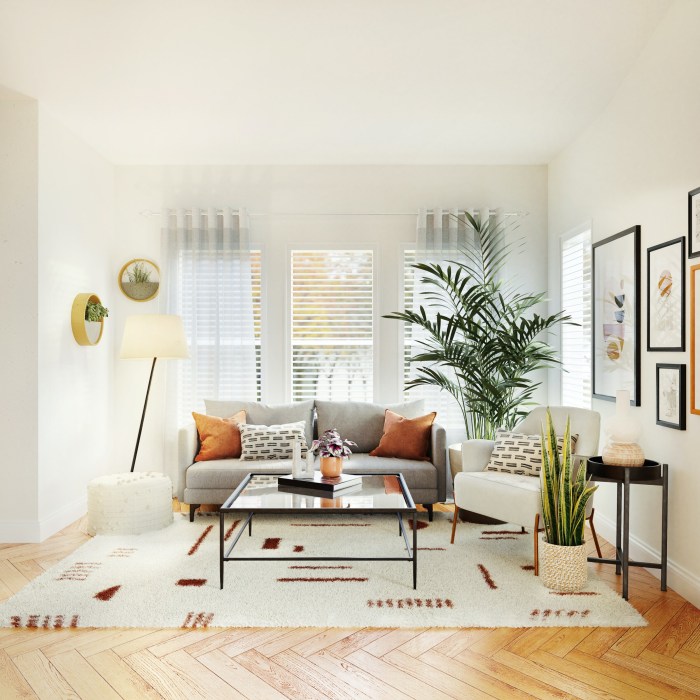
  • Home decor hacks on a budget Stylish spaces affordably

    Home decor hacks on a budget Stylish spaces affordably

    Transforming your living space into a haven of style needn’t break the bank. This exploration delves into the fascinating world of budget-friendly home decor, revealing how repurposing, DIY projects, and clever design choices can yield stunning results. We’ll unravel the science of visual appeal, combining practical techniques with aesthetic principles to create spaces that are both beautiful and cost-effective.

    From upcycling discarded materials to harnessing the power of natural elements, we’ll uncover the secrets to achieving a cohesive and stylish home without compromising your financial well-being.

    The principles of design, color theory, and material science intertwine to create a holistic approach. We’ll examine the physics of light and how it interacts with different surfaces to enhance ambiance, and the psychology of color to evoke specific moods. Furthermore, we’ll analyze the structural integrity of repurposed materials to ensure safety and longevity in your DIY projects.

    Each hack presented is grounded in practical application, offering step-by-step instructions and insightful tips for achieving professional-looking results.

    Repurposing Existing Items

    Repurposing existing items is a cornerstone of budget-friendly home decor, aligning with the principles of sustainability and resourcefulness. By transforming discarded or underutilized objects, we not only save money but also reduce waste and inject unique character into our living spaces. This process involves a blend of creativity, practical skills, and an understanding of material properties.

    Repurposing Glass Jars into Decorative Storage Solutions

    Transforming ordinary glass jars into aesthetically pleasing storage solutions involves a simple yet effective process. The inherent transparency of glass allows for the contents to be easily visible, while the cylindrical shape lends itself to a variety of decorative techniques.

    • Painted Jars: A simple coat of acrylic paint, in a solid color or a more intricate design, can instantly elevate the appearance of a jar. Techniques such as stenciling, sponging, or dry brushing can add texture and visual interest. Consider using chalkboard paint for a reusable surface to write labels or messages.
    • Decoupaged Jars: Decoupage, the art of decorating an object by gluing paper cutouts onto its surface, provides endless possibilities. Use patterned napkins, magazine clippings, or even printed photographs to create a unique, personalized look. Seal the decoupage with a clear varnish for durability.
    • Embellished Jars: Add embellishments such as ribbons, lace, twine, or buttons to enhance the jars’ visual appeal. These additions can create a rustic, romantic, or whimsical aesthetic depending on the chosen materials and arrangement. Consider using hot glue for secure attachment.
    • Textured Jars: Create texture by applying materials like sand, glitter, or small beads to the painted surface before sealing with a varnish. This technique adds depth and tactile interest to the jars.
    • Mosaic Jars: Broken pieces of ceramic tiles, glass, or even mirrors can be adhered to the jar’s surface to create a mosaic effect. Use a strong adhesive and grout to secure the pieces and create a durable, visually striking finish. The reflective quality of mirror pieces can add a particularly elegant touch.

    Transforming Old Clothing into Unique Home Decor Items

    Old clothing, often discarded due to wear or changes in fashion, can be surprisingly versatile in home decor. The fabrics’ textures and patterns offer opportunities to create unique and personalized pieces. Proper cleaning and preparation of the fabric are crucial to ensure the longevity of the finished product.

    • Fabric-Covered Lampshades: Old shirts or skirts can be repurposed to create unique lampshades. The fabric can be stretched over an existing lampshade frame or used to create a completely new one using a sturdy wire frame. The process involves careful measuring, cutting, and securing the fabric to the frame.
    • Quilted Wall Hangings: Scraps of fabric from old clothing can be pieced together to create a unique quilted wall hanging. This project requires basic quilting skills or the use of a sewing machine. The resulting wall hanging adds warmth and texture to a room.
    • T-Shirt Rugs: Old t-shirts, cut into strips and braided or knotted together, can be transformed into a durable and colorful rug. This technique is relatively simple and allows for creative expression through color combinations and knotting patterns. The resulting rug is both functional and visually interesting.

    Repurposing Old Pallets into Functional and Aesthetically Pleasing Home Decor Elements

    Old wooden pallets, often discarded after use in shipping and logistics, can be repurposed into a variety of home decor items. However, it’s crucial to prioritize safety by thoroughly inspecting the pallets for any signs of damage, pests, or hazardous materials before use. Always wear appropriate safety gear, including gloves and eye protection, during the repurposing process. Sanding and finishing the wood is essential to ensure a smooth, aesthetically pleasing, and safe surface.

    • Pallet Headboards: Disassembled pallets can be used to create a rustic and unique headboard. The wood can be sanded, stained, or painted to match the existing bedroom decor. Properly securing the headboard to the wall is crucial for safety.
    • Pallet Shelves: Pallets can be easily transformed into rustic shelves. Individual planks can be removed and reassembled to create a desired configuration. Sanding and finishing are essential to create a smooth, safe surface.
    • Pallet Coffee Table: Larger pallets can be repurposed into a unique coffee table. This requires careful planning and assembly, ensuring stability and safety. Adding casters to the bottom can enhance mobility.
    • Pallet Garden Planters: Pallets can be used to create vertical gardens. Individual slats can be removed and used as dividers to create compartments for planting. Proper drainage is essential to prevent rot.
    • Pallet Coat Rack: Individual planks can be attached to a wall to create a rustic coat rack. Sanding and finishing the wood is crucial to create a smooth and safe surface. Consider adding hooks for extra functionality.

    DIY Projects Using Affordable Materials

    Affordable tips easy décor easier refreshing expect than these can

    Transforming your living space doesn’t require a hefty budget. By embracing creativity and resourcefulness, inexpensive materials can be repurposed into stunning home decor pieces. This section details several projects utilizing readily available and affordable materials, demonstrating the power of DIY in achieving a stylish and personalized home environment. The principles of visual balance, color theory, and texture contrast are applied to ensure aesthetically pleasing results.

    Creating Visually Appealing Wall Art from Cardboard, Paint, and Recycled Materials

    The strategic use of color, texture, and shape is crucial in creating visually appealing wall art. This section explores three distinct wall art designs, all based on inexpensive and readily available materials. The principles of Gestalt psychology, which describes how humans perceive visual patterns, are applied to create cohesive and balanced compositions.

    • Layered Cardboard Sculpture: Multiple layers of cardboard cut into varying shapes (geometric or organic) are stacked and glued together. Each layer can be painted a different color, creating a depth effect. Adding recycled materials like buttons, bottle caps, or fabric scraps further enhances texture and visual interest. The principle of proximity, where elements close together are perceived as a group, is used to create visual unity.

      A balanced composition is achieved by distributing the visual weight evenly across the piece, preventing any single element from dominating.

    • Recycled Material Collage: This involves assembling a variety of recycled materials – such as magazine clippings, fabric scraps, bottle caps, and broken jewelry – onto a cardboard base. The arrangement should follow principles of visual hierarchy, guiding the viewer’s eye through the composition. A color scheme, whether monochromatic or complementary, unifies the disparate elements. The juxtaposition of textures – rough cardboard against smooth glass, for example – adds visual interest.

    • Painted Cardboard Shapes: Simple geometric shapes (circles, squares, triangles) cut from cardboard are painted in vibrant colors and arranged on a larger piece of cardboard or directly on the wall. The use of contrasting colors creates visual excitement, while a repeating pattern or motif introduces rhythm and order. The principle of closure, where the brain completes incomplete shapes, can be used to create a sense of unity and visual coherence.

    Crafting a Stylish Throw Pillow Cover from Fabric Scraps

    Upcycling fabric scraps offers a sustainable and budget-friendly way to create stylish throw pillow covers. This section provides a step-by-step guide catering to different sewing skill levels. The choice of fabric and design can dramatically alter the final aesthetic, from rustic charm to modern minimalism.

    1. Measure and Cut: Measure your existing pillow to determine the required fabric dimensions, adding seam allowance (approximately ½ inch). Cut two identical pieces of fabric.
    2. Pin and Sew (Beginner): Pin the two fabric pieces together, right sides facing inward. Sew along three sides, leaving one side open for turning. Turn the cover right side out and insert the pillow. A simple running stitch can be used for beginners.
    3. Pin and Sew (Intermediate): Follow the same steps as above, but add decorative stitching along the seams or incorporate a contrasting fabric trim for enhanced visual appeal. Experiment with different stitch types to add texture and visual interest.
    4. Pin and Sew (Advanced): Create a more complex design, such as using multiple fabrics, incorporating bias tape, or adding embellishments like buttons or embroidery. Consider techniques like French seams for a cleaner finish.

    Five Methods for Creating Inexpensive Candle Holders

    Mason jars, teacups, and other recycled containers can be transformed into attractive candle holders with minimal effort and cost. This section explores five different methods, emphasizing the versatility of readily available materials. The selection of container, candle type, and decorative elements influences the overall style and ambiance.

    • Mason Jar Lanterns: Simple yet elegant, mason jars can be decorated with paint, lace, or twine. Adding small holes near the top allows for light diffusion, creating a soft, ambient glow. The shape of the jar and the color of the paint will influence the final aesthetic.
    • Teacup Candle Holders: Teacups, particularly vintage or mismatched ones, offer a charming and unique candle holder option. Place a small tea light or votive candle inside. The color and pattern of the teacup add character and personality.
    • Recycled Bottle Candle Holders: Clean and dry glass bottles can be transformed into candle holders. Paint them, add decals, or wrap them with twine. The shape and size of the bottle influence the overall design.
    • Tin Can Candle Holders: Clean and dry tin cans can be decorated with paint, stencils, or decoupage. Ensure the can is heat-resistant before placing a candle inside. The use of stencils and bold colors can create a modern and graphic design.
    • Painted Wine Bottle Candle Holders: Wine bottles, after thorough cleaning, can be painted in various colors or patterns. Place a pillar candle inside for a sophisticated look. The use of metallic paints can create a glamorous and elegant effect.

    Budget-Friendly Furniture Makeovers

    Transforming outdated furniture into stylish pieces without breaking the bank is achievable through a combination of creative techniques and readily available materials. This process not only saves money but also reduces waste, aligning with sustainable living practices. The following sections explore effective methods for rejuvenating furniture, emphasizing affordability and practicality.

    Paint Transformations: A Fresh Coat for Old Furniture

    The application of paint is a fundamental technique for furniture makeovers. Proper preparation is crucial for achieving a durable and aesthetically pleasing finish. Begin by thoroughly cleaning the furniture surface to remove dust, dirt, and grease. This can be done using a mixture of mild detergent and water, followed by a thorough rinsing and drying. Sanding the surface with fine-grit sandpaper will create a smoother surface, improving paint adhesion.

    For a high-quality finish, apply a primer coat before applying the chosen paint. This helps to even out the surface and prevents the underlying wood grain from showing through. Multiple thin coats of paint are recommended, allowing each coat to dry completely before applying the next. For a professional touch, consider using a high-quality paintbrush or a paint sprayer for an even application.

    Finally, seal the paint with a protective topcoat to enhance durability and longevity. For example, a distressed look can be achieved by applying a base coat, then lightly sanding some areas before applying a top coat, revealing the base color underneath.

    Stenciling: Adding Pattern and Texture

    Stenciling offers a simple yet effective method for adding intricate designs to furniture. Choose a stencil design that complements the furniture’s style and the overall room décor. Secure the stencil firmly to the furniture surface using painter’s tape to prevent smudging. Apply the paint using a sponge brush or stencil brush, using gentle dabbing motions to avoid bleeding under the stencil.

    Remove the stencil carefully once the paint has dried slightly. Multiple layers of paint may be needed to achieve the desired color intensity. For a more sophisticated look, experiment with layering different colors and stencils. For instance, a floral stencil in muted tones can add elegance to a bedside table, while a geometric stencil in bold colors can create a modern accent on a dresser.

    Cleaning the stencil thoroughly after each use will prolong its lifespan.

    Decoupage: A Collage Approach to Furniture Makeover

    Decoupage involves adhering decorative paper, fabric, or images to a furniture surface and sealing it with a protective layer. Choose images or patterns that reflect personal style and complement the existing décor. Prepare the surface of the furniture by cleaning and sanding it as described in the paint transformation section. Apply a thin layer of decoupage medium to both the furniture surface and the back of the chosen images.

    Carefully adhere the images to the surface, smoothing out any air bubbles or wrinkles using a soft cloth or sponge. Once the images are securely attached, apply several coats of decoupage medium to seal the images and protect them from damage. Allow each coat to dry completely before applying the next. Decoupage can be used to create a unique and personalized look, transforming an ordinary piece of furniture into a statement piece.

    For example, using vintage maps to decoupage a coffee table can create a unique and sophisticated look.

    Affordable Furniture Upgrade Ideas

    Upgrading existing furniture using readily available materials can significantly enhance its aesthetic appeal and functionality.

    • New Upholstery: Replacing worn-out fabric on chairs or sofas with affordable fabrics from discount stores or online retailers can dramatically change their appearance. Imagine a worn-out armchair transformed with a vibrant floral print fabric, instantly adding a touch of freshness and personality to a living room. The image depicts a before-and-after view: the before image shows a dull, faded armchair, while the after image showcases the same chair with a bright, patterned fabric, making it look brand new.

    • Updated Hardware: Replacing old, tarnished knobs and pulls with new, stylish hardware is a quick and inexpensive way to update cabinets, drawers, and other furniture pieces. Consider the image of a kitchen cabinet with dull, brass knobs, juxtaposed with the same cabinet featuring sleek, modern silver knobs. The simple change elevates the cabinet’s look significantly.
    • Added Storage: Incorporating simple storage solutions like baskets, shelves, or fabric bins can add functionality and organization to furniture pieces. Picture a plain bookcase transformed with woven baskets to store blankets and throws, adding a rustic charm and practical storage.
    • Wood Stain Refresh: Applying a fresh coat of wood stain can revitalize the appearance of wooden furniture, bringing out the natural beauty of the wood grain. Consider the image of a dark, worn wooden table, contrasted with the same table after applying a light oak stain, revealing the rich wood grain and creating a lighter, brighter feel.
    • Simple Woodworking Additions: Adding simple wooden elements like shelves or legs can transform the functionality and style of existing furniture. For example, an old chest can be given new life by adding new legs, elevating it and changing its overall style. The image would show a low, sturdy chest before the addition, and then the same chest raised on elegant new legs.

    Budget-Friendly Refinishing Techniques for Wooden Furniture

    Refinishing wooden furniture can significantly enhance its appearance and longevity. Three common methods are:

    1. Sanding and Staining: This involves sanding the furniture to remove old finishes, followed by applying a new stain and sealant. The process requires sandpaper of varying grits, stain, sealant, and brushes or rags. The steps involve sanding, cleaning, staining, and sealing. This method is ideal for restoring the natural beauty of the wood.
    2. Painting: Painting is a straightforward method for covering imperfections and updating the furniture’s color. The process requires paint, primer (often necessary), brushes, and sandpaper for preparation. The steps include cleaning, priming (if needed), painting, and sealing. This is a great option for disguising flaws and achieving a bold new look.
    3. Milk Paint: Milk paint is a natural, eco-friendly option that provides a unique, slightly distressed finish. The process involves mixing the paint powder with water, applying it, and allowing it to dry. This method is relatively easy to use and offers a charming, rustic look. It requires less preparation than sanding and staining, offering a quicker turnaround.

    Decorating with Natural Elements

    Harnessing the beauty of the natural world offers a sustainable and cost-effective approach to interior design. Bringing the outdoors in not only enhances the aesthetic appeal of a space but also contributes to a sense of calm and well-being, connecting us to the rhythms of nature. The inherent textures, colors, and forms found in nature provide a unique and ever-changing palette for home décor, constantly evolving with the seasons.

    Five readily available natural elements perfect for inexpensive and visually appealing home decor include branches, leaves, pinecones, stones, and wildflowers. These elements, easily foraged or collected responsibly from local parks or gardens (always respecting local regulations and avoiding protected areas), offer a diverse range of textures, colors, and shapes. Branches provide structural elements, leaves add pops of color and texture, pinecones offer interesting geometric forms, stones provide weight and stability, and wildflowers inject vibrant hues and delicate beauty.

    Their incorporation into interior design allows for the creation of unique and personalized spaces, reflecting the beauty and diversity of the natural world.

    Methods for Creating Visually Appealing Displays Using Natural Materials

    Several simple methods allow for the creation of striking displays using foraged natural materials. These techniques leverage the inherent beauty of the materials and require minimal tools or specialized skills. The key lies in careful selection, thoughtful arrangement, and consideration of the overall aesthetic.

    Firstly, creating a simple yet elegant arrangement involves grouping branches of varying lengths and thicknesses in a vase or container. The branches can be left in their natural state or painted for a more vibrant look. The use of different textures and colors can be strategically employed, perhaps incorporating some leaves for added visual interest. Secondly, a stunning wall hanging can be constructed using a variety of dried leaves and flowers pressed between sheets of absorbent paper and then framed.

    This method beautifully preserves the colors and forms of the botanicals, resulting in a unique piece of art. Finally, pinecones, stones, and other small natural items can be arranged in a shallow bowl or tray to create a textured and visually rich centerpiece. This method allows for a high degree of customization, allowing you to play with color, shape, and texture to create a unique focal point.

    Creating a Unique Centerpiece Using Foraged Natural Materials

    Creating a seasonal centerpiece using foraged materials involves a step-by-step process emphasizing careful selection and artistic arrangement. The process is heavily influenced by the season, allowing for a constantly evolving display that reflects the changing landscape.

    1. Gathering Materials: Begin by collecting a variety of natural elements relevant to the current season. For example, in autumn, gather fallen leaves in various shades of red, orange, and yellow, along with acorns, pinecones, and small branches. In spring, focus on fresh blossoms, delicate twigs, and moss. Remember to always collect responsibly and avoid damaging plants or disturbing wildlife.

    2. Preparing Materials: If using fresh flowers or leaves, consider techniques for preservation, such as air drying or pressing. For branches, trim them to desired lengths and remove any excess leaves or debris. Clean stones or pinecones gently with a brush.
    3. Choosing a Container: Select a container that complements the chosen materials and your overall style. A rustic wooden bowl, a glass vase, or even a repurposed teacup can work effectively.
    4. Arranging the Materials: Begin by placing larger items, such as branches or stones, at the base of the container to create a foundation. Then, layer smaller items, such as leaves, flowers, or pinecones, on top. Consider color, texture, and height variations to create visual interest. Avoid overcrowding the container, allowing space for the elements to breathe.
    5. Adding Finishing Touches: Consider adding small decorative elements, such as candles or ribbon, to enhance the centerpiece. Adjust the arrangement until you achieve a balanced and aesthetically pleasing result. Remember, the key is to let the natural beauty of the materials shine through.

    Creating a Cohesive and Stylish Look on a Budget

    Achieving a stylish and unified home decor scheme doesn’t necessitate a large budget. By employing strategic planning and creative repurposing, a cohesive and visually appealing space can be created without compromising on style or exceeding financial limitations. This involves understanding the psychology of color and spatial arrangement, and leveraging readily available, affordable resources.The principles of visual perception, specifically Gestalt psychology, inform how we interpret visual elements.

    Our brains naturally seek patterns and connections; by understanding this, we can strategically use color, texture, and lighting to create a harmonious and engaging environment. The following strategies will demonstrate how to effectively utilize these principles to maximize visual impact while minimizing cost.

    Color Palette Selection and Pattern Usage for Budget-Friendly Visual Impact

    Effective color palette selection is paramount for creating a cohesive look. A limited palette, utilizing analogous colors (those adjacent on the color wheel, like blues and greens) or complementary colors (opposite each other, like blue and orange), provides visual harmony. This reduces the need for purchasing numerous items in varying colors, thus saving money. For instance, a base of soft greys, accented with pops of teal and mustard yellow, creates a sophisticated yet affordable look.

    Similarly, repeating a single pattern across different elements, such as throw pillows, curtains, and a rug, establishes a sense of unity and visual interest without needing to buy multiple different patterned items. The use of a single dominant pattern, perhaps a subtle geometric design or a floral print, can create a visually engaging space without overwhelming the senses.

    Affordable Lighting Solutions to Enhance Ambiance

    Lighting significantly impacts a room’s atmosphere and perceived size. Strategic lighting can enhance a room’s features and create a sense of depth and warmth without breaking the bank. Instead of expensive statement lighting, consider using a combination of ambient, task, and accent lighting. Ambient lighting provides overall illumination; affordable options include strategically placed LED bulbs in ceiling fixtures or inexpensive track lighting.

    Task lighting, crucial for reading or working, can be achieved with affordable desk lamps or clip-on lights. Accent lighting highlights specific features; this can be achieved with inexpensive fairy lights or strategically placed candles (with appropriate safety precautions). The interplay of these lighting types creates a layered and dynamic effect, enhancing the overall aesthetic appeal without significant financial investment. For instance, warm-toned LED bulbs in a living room paired with a simple table lamp near a reading nook and string lights outlining a bookshelf can transform the space into a cozy and inviting environment.

    Five Tips for Creating a Cohesive and Stylish Home Decor Scheme on a Budget

    Creating a cohesive home decor scheme on a budget requires a strategic approach. The following five tips provide a framework for achieving this goal:

    • Prioritize Functionality and Style: Focus on purchasing high-quality, versatile pieces that serve multiple purposes. A stylish storage ottoman can double as seating, while a large mirror can make a small room feel more spacious.
    • Shop Secondhand and Repurpose: Explore thrift stores, flea markets, and online marketplaces for unique and affordable furniture and decor. Repurposing existing items, such as turning old jars into vases or using pallets for shelving, adds character and reduces costs.
    • Embrace DIY Projects: Simple DIY projects can significantly enhance your home’s aesthetic appeal without high costs. Painting furniture, creating your own artwork, or sewing curtains are budget-friendly options that add personality.
    • Use Natural Elements: Incorporating natural elements, such as plants, wood, and stone, adds warmth and texture to a space at minimal cost. Potted plants, branches in vases, or even a collection of rocks can create a visually appealing and natural aesthetic.
    • Focus on a Few Key Pieces: Instead of buying many inexpensive items, invest in a few high-impact pieces that will serve as focal points. A striking rug, a unique piece of artwork, or an eye-catching lamp can elevate the entire room’s design.

    Final Summary

    Home decor hacks on a budget

    Ultimately, achieving a stylish and inviting home on a budget is an achievable goal. By understanding the principles of design, embracing creativity, and utilizing readily available resources, you can transform your living space into a reflection of your personal style without the hefty price tag. Remember, the most impactful home decor isn’t necessarily the most expensive; it’s the most thoughtfully curated and personally expressive.

    The journey of creating a beautiful and affordable home is a rewarding one, filled with the satisfaction of transforming ordinary objects into extraordinary elements of your personal sanctuary. The science of aesthetics meets the art of resourcefulness, proving that beauty and budget can harmoniously coexist.

    Top FAQs

    What are some common mistakes to avoid when repurposing items?

    Failing to properly clean and prepare materials before repurposing can lead to uneven finishes or structural issues. Overlooking safety precautions when working with tools or potentially hazardous materials is also crucial. Finally, neglecting the overall aesthetic coherence of the repurposed items within the existing decor can result in a disjointed and unappealing look.

    How can I ensure my DIY projects are structurally sound?

    Using appropriate adhesives, fasteners, and reinforcing techniques based on the materials used is vital. Properly measuring and planning before starting any project helps prevent structural weaknesses. Researching the specific properties of the materials you’re using ensures that you select the right techniques and avoid potential failures.

    Where can I find affordable, high-quality materials for my projects?

    Thrift stores, flea markets, and online marketplaces offer a wealth of inexpensive materials. Discount home improvement stores often have sales on paint, hardware, and other supplies. Recycling centers and construction sites (with permission) can be sources of reclaimed wood and other materials.

    How do I choose a cohesive color palette for my home decor?

    Start by identifying a color that evokes the desired mood or reflects your personal style. Use a color wheel to select complementary, analogous, or contrasting colors that create visual harmony. Consider the existing elements in your room (flooring, furniture) to ensure a cohesive look. Online color palette generators can assist in finding suitable combinations.

    What are some tips for creating a visually appealing composition in my wall art?

    Consider the rule of thirds, placing focal points off-center for a more dynamic composition. Vary the sizes and shapes of the elements to create visual interest. Maintain a balance between positive and negative space to prevent overcrowding. Use a consistent color palette or theme to unify the elements.

  • Tropical Minimalist Beach House Design

    Tropical Minimalist Beach House Design

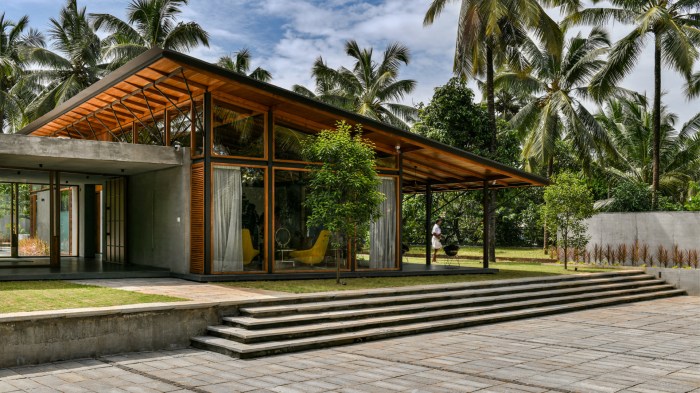
    Imagine a sanctuary where the gentle ocean breeze whispers through sustainably sourced timber, where natural light dances across minimalist interiors, and where every design element harmonizes with the breathtaking tropical landscape. This is the essence of a Tropical Minimalist Beach House – a haven crafted not only for comfort and aesthetic appeal but also for environmental responsibility. We delve into the architectural, interior, and exterior design principles that underpin this unique style, exploring the integration of passive design strategies, eco-friendly materials, and renewable energy sources to create a truly sustainable and harmonious living space.

    The journey will unveil the meticulous balance between modern simplicity and the vibrant energy of a tropical paradise.

    This exploration will cover the key elements of designing and building such a home, from the initial architectural blueprint emphasizing open spaces and natural light to the careful selection of locally sourced materials and the implementation of water and energy conservation measures. We will examine the integration of passive design strategies to minimize energy consumption, the creation of a minimalist yet inviting interior, and the landscaping choices that blend seamlessly with the surrounding beach environment.

    The goal is to present a comprehensive guide for anyone dreaming of building a beautiful, sustainable, and environmentally conscious tropical beach home.

    Architectural Design Principles

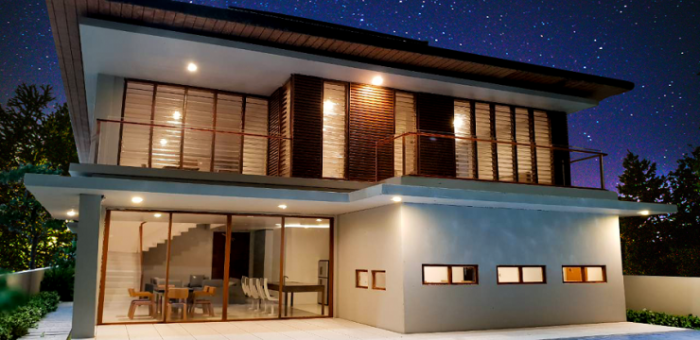
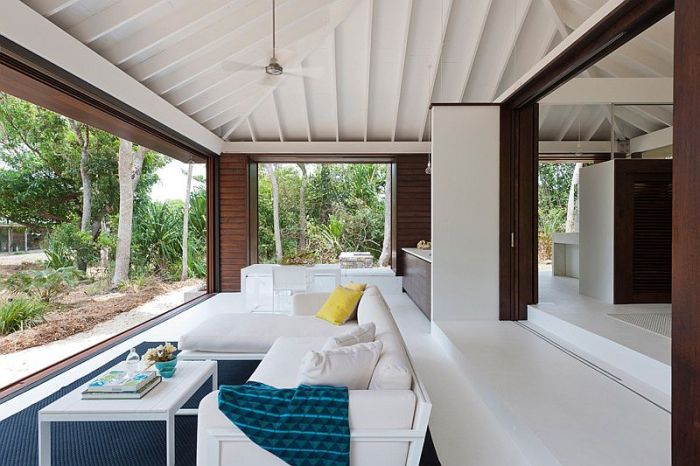
    Tropical peschard bernardi villa central shelter beatriz alejandro abraham fachadas kindesign daniel estilo pacifico onekindesign arquitetura rafael gamo interiorzine salvo

    The design of a tropical minimalist beach house prioritizes harmony with its environment, maximizing natural resources while minimizing environmental impact. This approach integrates sustainable building materials, passive design strategies, and an open floor plan to create a comfortable and energy-efficient living space. The following sections detail the key architectural design principles employed.

    Floor Plan Design

    The floor plan emphasizes open spaces and natural light, crucial for a tropical climate. The design prioritizes cross-ventilation and maximizes views of the surrounding ocean and landscape. A central living area connects seamlessly to the kitchen and dining spaces, creating a fluid and airy atmosphere. Bedrooms are strategically placed to offer privacy while still enjoying the natural light and ventilation.

    A large covered veranda extends the living space outdoors, providing shade and a transition between the interior and exterior environments.

    Room Dimensions (m²) Function Orientation
    Living Room 40 Central living space, connecting to kitchen and dining East
    Kitchen 15 Open-plan kitchen with island counter East
    Dining Room 12 Open to living room East
    Master Bedroom 25 En-suite bathroom, walk-in closet South
    Bedroom 2 15 Guest bedroom South
    Bathroom 1 8 Master bathroom South
    Bathroom 2 5 Guest bathroom South
    Veranda 30 Covered outdoor living space All sides

    Sustainable and Locally Sourced Materials

    The selection of building materials is critical for minimizing the environmental footprint of the house. Prioritizing locally sourced and sustainably harvested materials reduces transportation costs and emissions, supports local economies, and minimizes the overall carbon footprint.

    The following materials are considered:

    • Bamboo: A rapidly renewable resource, ideal for structural framing and flooring. Its inherent strength and flexibility make it a suitable substitute for traditional timber.
    • Reclaimed wood: Using reclaimed wood reduces the demand for newly harvested timber, decreasing deforestation and carbon emissions. The unique character of reclaimed wood adds aesthetic value.
    • Locally sourced stone: Stone from nearby quarries provides a durable and aesthetically pleasing building material with a lower carbon footprint compared to imported stone.
    • Rammed earth: A sustainable and energy-efficient building technique using compacted earth, readily available in many tropical regions. Rammed earth walls provide excellent thermal mass.
    • Thatch roofing: Traditional thatch roofing offers excellent insulation and ventilation, adapting well to tropical climates. Using sustainably harvested grasses minimizes environmental impact.

    Passive Design Strategies

    Passive design strategies aim to minimize energy consumption by harnessing natural resources such as sunlight, wind, and shade. This approach reduces reliance on mechanical systems like air conditioning and heating, decreasing energy costs and environmental impact.

    Passive Design Element Description Effectiveness Example
    Cross-ventilation Strategic placement of windows and doors to allow natural airflow High – reduces need for fans or AC Windows on opposite sides of the house
    Overhangs Roof overhangs shade windows during peak sun hours, reducing solar heat gain High – reduces cooling load Wide roof overhangs on south-facing windows
    Thermal mass Materials with high thermal mass absorb and release heat slowly, regulating indoor temperature Moderate – reduces temperature fluctuations Rammed earth walls
    Natural lighting Maximizing natural light reduces reliance on artificial lighting High – reduces energy consumption Large windows and skylights

    Interior Design & Furnishings

    The interior design of a tropical minimalist beach house should seamlessly blend the serenity of nature with the clean lines of minimalist aesthetics. This requires careful consideration of color palettes, textures, furniture choices, and decorative elements to create a space that is both visually appealing and functionally efficient. The overall aim is to evoke a sense of calm, relaxation, and connection with the surrounding environment.

    Color Palette and Textures

    The color palette for this tropical minimalist beach house draws inspiration from the natural surroundings. Think soft, muted tones reminiscent of the ocean and sand. A base of creamy whites and pale greys provides a neutral backdrop, allowing pops of color to stand out effectively. Accents of sandy beige, seafoam green, and coral evoke the tropical landscape without being overpowering.

    Textures play a crucial role in achieving the desired minimalist aesthetic. Natural materials such as woven rattan, smooth linen, and lightly textured cotton create a sense of warmth and tactility, while polished concrete or light-colored wood flooring adds a clean, modern touch. The overall feeling evoked is one of airy spaciousness and tranquil sophistication, a sanctuary where the indoor space flows seamlessly into the outdoor environment.

    Imagine sunlight filtering through sheer linen curtains, illuminating the subtle interplay of textures and colors.

    Essential Furniture Pieces

    Functionality and simplicity are paramount when selecting furniture. Each piece should serve a purpose and contribute to the overall minimalist aesthetic. A low-slung, modular sofa in light-colored linen offers comfortable seating and adaptability. Its clean lines and neutral color palette allow it to blend seamlessly into the background. A simple, solid wood dining table with matching chairs, possibly made from sustainably sourced teak or mango wood, provides a functional space for meals and gatherings.

    The natural grain of the wood adds warmth and character without detracting from the minimalist design. A sleek, white lacquered media console with ample storage keeps electronic devices organized and concealed. Finally, built-in wardrobes or minimalist shelving units in light wood or white maximize storage while maintaining a clean, uncluttered look. These pieces, carefully chosen for their material and style, contribute to the overall feeling of relaxed sophistication.

    Artwork and Decorative Elements

    Artwork and decorative elements should complement the tropical minimalist theme without overwhelming the space. Large-scale, abstract paintings in muted tones of blues, greens, and beige can serve as focal points, reflecting the natural surroundings without being overly literal. The use of natural materials in the artwork, such as pressed leaves or natural fibers incorporated into the canvas, further enhances the connection to the tropical environment.

    Sculptural pieces made from driftwood or polished stones add organic texture and visual interest, while strategically placed potted plants (such as snake plants or ZZ plants known for their low maintenance) introduce a touch of living greenery without cluttering the space. These elements, carefully selected and thoughtfully placed, enhance the minimalist aesthetic while creating a sense of calm and tranquility.

    The placement is crucial; avoid overcrowding and prioritize negative space to allow the eye to rest and appreciate the individual pieces.

    Exterior Design & Landscaping

    The exterior design of this tropical minimalist beach house prioritizes seamless integration with its coastal environment. This is achieved through a careful selection of materials, colors, and architectural features that both reflect and complement the natural beauty of the surrounding landscape. The design minimizes visual impact while maximizing functionality and durability in the harsh coastal climate.The overarching design philosophy emphasizes natural, sustainable materials and a muted color palette inspired by the beach itself.

    This approach minimizes the house’s visual footprint, allowing it to recede subtly into the background and enhance the natural beauty of the surroundings.

    Material Selection and Color Palette

    The primary building materials are sustainably sourced timber, locally quarried stone, and fiber cement panels. The timber, treated for weather resistance, provides a warm, natural aesthetic. The stone, chosen for its durability and ability to withstand salt spray, forms the foundation and accents various architectural features. The fiber cement panels, in a light, neutral tone, provide a low-maintenance, weatherproof exterior cladding.

    The color palette is predominantly composed of soft, sandy beige, muted greys, and subtle blues, echoing the colors of the sand, sea, and sky. This palette ensures the house blends harmoniously with the surrounding environment.

    Landscaping Plan for Minimal Environmental Impact

    The landscaping plan centers around the use of native tropical plants that require minimal irrigation and maintenance. This approach conserves water resources and reduces the reliance on fertilizers and pesticides, minimizing the environmental impact. The selection of species also prioritizes drought tolerance and salt resistance, ensuring the plants thrive in the coastal environment.The careful selection of plants also considers biodiversity and the creation of habitats for local wildlife.

    The use of native plants promotes the health of the local ecosystem and reduces the risk of introducing invasive species.

    • Seagrape (Coccoloba uvifera): Planted along the perimeter to create a natural screen and provide shade. Their broad leaves and tolerance for salt spray make them ideal for coastal locations.
    • Beach Hibiscus (Hibiscus tiliaceus): Strategically placed near the house to provide additional screening and beautiful, vibrant flowers. Their ability to withstand strong winds makes them suitable for coastal areas.
    • Pandanus (Pandanus tectorius): Used to create visual interest and add texture to the landscape. These plants are highly adaptable and tolerant of various soil conditions.
    • Dune grasses (various species): Planted along the dunes to stabilize the sand and prevent erosion. These grasses are crucial for maintaining the integrity of the coastal ecosystem.

    Outdoor Living Spaces

    The house incorporates several outdoor living spaces designed to maximize interaction with the natural surroundings. These spaces are seamlessly integrated with the overall design, extending the living area outdoors and blurring the lines between interior and exterior.

    Main Deck

    The main deck, constructed from sustainably sourced timber, extends from the living area and provides expansive views of the ocean. It features comfortable seating areas, a dining space, and a built-in barbecue, creating a perfect setting for outdoor entertaining. The deck’s design incorporates natural materials and muted colors to maintain the overall minimalist aesthetic.

    Private Patio

    A smaller, more secluded patio is located off the master bedroom, providing a tranquil space for relaxation. This patio is partially shaded by strategically planted beach hibiscus, offering a private retreat from the sun and a place to enjoy the sounds of the ocean. It features comfortable lounge chairs and a small fountain to create a soothing atmosphere.

    Balcony

    A small balcony is situated on the upper floor, offering panoramic views of the surrounding area. This space provides a quiet spot for contemplation and features a simple railing design that allows for unobstructed views. The balcony’s flooring is composed of durable, weather-resistant materials that complement the overall design.

    Sustainability & Eco-Friendly Features

    House luxury beach hawaii tropical hawaiian houses tumblr homes villa amazing modern ideas design style plans cottages weekend pool island

    Designing a tropical minimalist beach house necessitates a strong commitment to sustainability. Minimizing environmental impact is not merely a trend but a crucial aspect of responsible architecture, particularly in sensitive coastal ecosystems. This section details the eco-friendly building materials, water conservation strategies, and renewable energy integration implemented in this design.

    Eco-Friendly Building Materials for Tropical Climates

    The selection of building materials significantly influences the environmental footprint of a structure. For a tropical climate, materials must be durable, resistant to moisture and pests, and ideally sourced locally to reduce transportation emissions.

    Material Sustainability Cost Durability
    Bamboo Rapidly renewable, carbon-negative; requires sustainable harvesting practices. Relatively low High, with proper treatment against insects and moisture.
    Reclaimed Wood Reduces deforestation, extends the lifespan of existing materials. Moderate to high, depending on availability and type of wood. High, depending on the original wood’s quality and condition.
    Rammed Earth Uses locally sourced materials, low embodied energy. Low to moderate High, especially with proper moisture control techniques.
    Locally Sourced Stone Reduces transportation emissions, supports local economies. Variable, depending on the type of stone and availability. Very high, naturally resistant to weather and pests.

    Rainwater Harvesting and Greywater Recycling System

    Water conservation is paramount in arid or semi-arid tropical regions. This design incorporates a rainwater harvesting system and a greywater recycling system to significantly reduce reliance on municipal water supplies.The rainwater harvesting system comprises a rooftop collection area, gutters, filters, and storage tanks. Rainwater collected from the roof is channeled through filters to remove debris. This filtered water is then stored in underground tanks for later use in irrigation and toilet flushing.The greywater recycling system collects wastewater from showers and sinks.

    This water undergoes a three-stage process: 1) filtration to remove solids; 2) biological treatment using plants or microorganisms to break down organic matter; and 3) UV disinfection to eliminate harmful bacteria. Treated greywater is then used for irrigation. The system’s design prioritizes safety and prevents contamination of potable water supplies.

    Renewable Energy System Integration

    To minimize reliance on fossil fuels, the house design integrates a photovoltaic (PV) solar panel system. The solar panels are strategically placed on the south-facing roof to maximize sun exposure throughout the day. The system’s capacity is sized to meet the house’s energy demands, with excess energy fed back into the grid or stored in batteries for nighttime use.

    The system is monitored and controlled using a smart energy management system, optimizing energy consumption and production. The integration of solar panels minimizes the carbon footprint and reduces operating costs. A similar system has been successfully implemented in a similar coastal house in Costa Rica, reducing their electricity bill by 75% in the first year.

    Light and Airflow

    Tropical minimalist design interior house valencia room living go iloilo stands out ceiling bluprint architecture interiors spaces onemega article paolo

    The design of this tropical minimalist beach house prioritizes the seamless integration of natural light and airflow, creating a comfortable and energy-efficient living space. Strategic placement of windows and doors, coupled with the selection of appropriate building materials and shading devices, work in concert to achieve this goal. The resulting environment is both aesthetically pleasing and environmentally responsible.The strategic placement of windows and doors is paramount in maximizing natural light and ventilation.

    Large, expansive windows facing east and west capture the morning and evening sun, providing ample natural light while minimizing harsh midday glare. Doors, especially those leading to outdoor spaces like patios or decks, are strategically positioned to create cross-ventilation. This cross-ventilation, driven by the natural pressure difference between the interior and exterior, facilitates a constant flow of fresh air, reducing the reliance on air conditioning.

    Window and Door Placement for Optimal Airflow

    Imagine a floor plan where two large windows are placed on opposite sides of a living room, one facing east and the other west. A sliding glass door leads to a covered patio on the south side. The morning sun enters through the east-facing window, illuminating the space. As the day progresses, the west-facing window takes over, providing ample light into the evening.

    The open patio door, combined with the strategically placed windows, creates a natural airflow pattern. Warm air rises and exits through the west-facing window, drawing in cooler air from the east, creating a gentle breeze throughout the living room. A simple diagram would show arrows indicating the direction of airflow, moving from the east window, across the room, and out through the west window and patio door.

    This principle of cross-ventilation is replicated throughout the house, maximizing natural airflow and minimizing the need for mechanical ventilation.

    Natural Materials and Light Colors for Enhanced Spaciousness

    The use of natural materials such as bamboo, sustainably sourced wood, and light-colored stone significantly contributes to the house’s bright and airy ambiance. These materials not only reflect light, increasing the perceived spaciousness, but also maintain a comfortable interior temperature. Light colors, particularly on walls and ceilings, further enhance the effect. Light-colored surfaces reflect more light than dark surfaces, minimizing the need for artificial lighting and reducing heat absorption.

    For example, white walls reflect approximately 80% of visible light, while dark-colored walls reflect considerably less. This principle is supported by the science of thermal radiation and light reflection. The selection of light-colored furniture and textiles further reinforces this strategy.

    Shading Devices for Sunlight Control

    Overhanging eaves and adjustable louvers are integrated into the design to effectively control sunlight and reduce heat gain. The eaves, extending several feet from the roofline, provide shade during the hottest part of the day, preventing direct sunlight from entering the windows and reducing solar heat gain. Adjustable louvers, installed on windows and strategically placed throughout the house, allow for precise control over the amount of sunlight entering the building.

    These louvers can be opened to allow natural light and ventilation, and closed to block direct sunlight and reduce glare during peak sun hours. A diagram showing the effect of the overhanging eaves casting a shadow on the walls and windows, reducing the direct sunlight, would visually represent this concept. Similarly, a diagram showcasing the adjustable louvers in both open and closed positions, demonstrating their ability to control the amount of light entering a room, would further clarify the effectiveness of this design element.

    The combination of these shading devices reduces the need for air conditioning and promotes energy efficiency.

    Conclusion

    Tropical minimalist beach house

    Constructing a Tropical Minimalist Beach House is more than just building a home; it’s about creating a symbiotic relationship between architecture, nature, and sustainable living. By carefully considering the architectural design, interior and exterior aesthetics, and the integration of eco-friendly features, we can achieve a dwelling that is not only visually stunning but also environmentally responsible. The principles of minimalism, coupled with the utilization of passive design strategies and renewable energy sources, contribute to a reduced environmental footprint, creating a haven that respects and celebrates the beauty of its tropical surroundings.

    The result is a structure that exemplifies harmony between human habitation and the natural world, a testament to thoughtful design and sustainable practices.

    Popular Questions

    What are the typical costs associated with building a tropical minimalist beach house?

    Costs vary significantly based on location, size, materials used, and level of customization. Expect a wide range, from hundreds of thousands to millions of dollars.

    What are the challenges of building in a coastal environment?

    Coastal construction faces challenges like salt corrosion, extreme weather events (hurricanes, typhoons), and strict building codes designed to protect coastal ecosystems. Careful material selection and robust construction techniques are crucial.

    How do I ensure the longevity of the house in a tropical climate?

    Using durable, weather-resistant materials, implementing proper drainage systems to prevent water damage, and incorporating pest control measures are vital for extending the lifespan of a tropical beach house.

    What are some examples of native tropical plants suitable for landscaping?

    Suitable plants vary by location. Consult local nurseries for recommendations on drought-tolerant, salt-resistant species that thrive in your specific area. Examples might include palms, hibiscus, and various succulents.

    How can I maintain the minimalist aesthetic over time?

    Regular decluttering, strategic storage solutions, and a commitment to purchasing only functional and aesthetically pleasing items will help maintain the minimalist style. Avoid accumulating unnecessary items.

  • Tropical Minimalism for Hot Climates Design Strategies

    Tropical Minimalism for Hot Climates Design Strategies

    Tropical minimalism for hot climates represents a fascinating intersection of design philosophy and environmental adaptation. It transcends mere aesthetic preference, becoming a practical response to the challenges posed by intense heat and humidity. This approach prioritizes functionality and natural materials, creating spaces that are not only visually appealing but also thermally comfortable and sustainable. By understanding the principles of tropical minimalism, we can design homes that harmonize with their environment, promoting well-being and minimizing environmental impact.

    This exploration delves into the core principles of this design style, examining how it differs from other minimalist approaches and how it leverages natural elements to mitigate the effects of a hot climate. We will investigate material choices, color palettes, space planning, lighting and ventilation strategies, and landscaping techniques, all aimed at creating a cool, comfortable, and visually stunning living environment.

    The scientific basis behind these design choices, focusing on thermal comfort and energy efficiency, will be highlighted throughout.

    Defining Tropical Minimalism for Hot Climates

    Tropical minimalism, unlike its temperate counterparts, prioritizes functionality and climate responsiveness above all else. It embraces simplicity but with a focus on maximizing natural ventilation, light, and shade to mitigate the intense heat and humidity prevalent in tropical regions. This contrasts with other minimalist styles which often prioritize clean lines and a stark aesthetic, sometimes at the expense of environmental considerations.

    Tropical minimalism, instead, integrates seamlessly with its surroundings, creating spaces that are both visually appealing and environmentally sustainable.

    Core Principles of Tropical Minimalism

    Tropical minimalist design centers around a few key principles. First, it emphasizes open floor plans to encourage airflow, minimizing the need for energy-intensive air conditioning. Second, it utilizes natural materials with high thermal mass, which absorb and release heat slowly, moderating temperature fluctuations throughout the day. Third, it strategically incorporates shading devices, such as overhanging eaves, louvers, and strategically planted vegetation, to reduce solar heat gain.

    Finally, it prioritizes natural light, maximizing daylight penetration while minimizing direct sunlight exposure. These principles directly address the challenges posed by hot and humid climates, creating comfortable and energy-efficient living spaces.

    Material Selection in Tropical Minimalism

    The materials employed in tropical minimalist architecture are crucial for its success. Locally sourced, sustainable materials are favored to minimize environmental impact and reduce transportation costs. Common choices include bamboo, which is lightweight, readily available in many tropical regions, and highly renewable; sustainably harvested timber, offering strength and natural insulation; and natural stone, such as limestone or laterite, known for their high thermal mass and ability to regulate indoor temperatures.

    Rammed earth, a traditional building technique, is also experiencing a resurgence due to its excellent thermal properties and low environmental impact. These materials not only contribute to the aesthetic but also enhance the building’s performance in hot climates.

    Comparative Analysis of Architectural Styles

    The following table compares tropical minimalism with other architectural styles suitable for hot climates, highlighting their distinct approaches to material selection, climate responsiveness, and key features:

    Style Material Climate Suitability Key Features
    Tropical Minimalism Bamboo, timber, natural stone, rammed earth Excellent (high heat & humidity) Open plan, natural ventilation, high thermal mass materials, shading devices
    Mediterranean Stucco, terracotta tiles, stone Good (hot, dry summers) Thick walls, whitewashed surfaces, courtyards, shaded outdoor spaces
    Vernacular (varies regionally) Locally sourced materials (e.g., thatch, mud brick) Good (adapts to specific regional climates) Passive design strategies tailored to local climate conditions

    Color Palettes and Material Selection

    Modern surabaya papan pilih houses zap toptrendpin

    Tropical minimalist design for hot climates prioritizes both aesthetic appeal and thermal comfort. Careful consideration of color palettes and material selection is crucial in achieving this balance, creating spaces that are visually calming and physically cool. The interplay of light reflection, heat absorption, and the inherent properties of materials significantly impacts the overall ambiance and livability of a home in warm weather.Color palettes in tropical minimalist design often leverage the natural environment as inspiration.

    These palettes are carefully chosen to maximize light reflection, minimizing heat absorption, and creating a sense of spaciousness. The use of natural materials further enhances this effect, creating a symbiotic relationship between design and environmental response.

    Light-Colored Paints and Heat Reflection

    Light-colored paints play a vital role in maintaining a cool interior temperature. Their high albedo – the ratio of reflected to incident light – means they reflect a significant portion of the sun’s radiant energy. Darker colors, conversely, absorb more heat, leading to increased indoor temperatures. For instance, a white or light-grey wall will reflect up to 80% of sunlight, while a dark brown or black wall might only reflect 10-20%, leading to a considerable difference in room temperature, especially under direct sunlight.

    The difference can be measured in several degrees Celsius. This principle is well-established in architectural physics and is widely applied in hot and arid climates to reduce energy consumption from air conditioning.

    Natural Materials and Thermal Regulation

    The incorporation of natural materials such as bamboo, rattan, and sustainably sourced wood offers both aesthetic and functional benefits. These materials possess inherent thermal properties that contribute to a cooler interior environment. Bamboo, for example, is known for its breathability, allowing for better air circulation and reducing the buildup of heat. Rattan, with its open weave structure, also promotes air flow.

    Wood, particularly lighter-colored woods, reflects sunlight and absorbs less heat compared to other materials like concrete or metal. These natural materials also contribute to a sense of tranquility and connection with the surrounding environment, enhancing the overall tropical minimalist aesthetic. The thermal mass of these materials also helps to moderate temperature fluctuations throughout the day.

    Sample Tropical Minimalist Bedroom Color Palette

    A soothing and thermally efficient color palette for a tropical minimalist bedroom could include the following:

    Color Name Hex Code Description
    Seashell White #F8F8FF A soft, airy white that reflects maximum light.
    Celadon Green #A7D1AB A calming, muted green reminiscent of tropical foliage.
    Driftwood Grey #B2BEB5 A neutral grey that complements the other colors, mimicking the color of bleached wood.
    Ocean Aqua #79CBCB A soft, cool blue that evokes a sense of calm and tranquility.

    This palette utilizes light and airy shades, promoting a feeling of spaciousness and coolness, while the muted green and blue tones draw inspiration from the tropical landscape, creating a harmonious and relaxing atmosphere. The use of these colors in conjunction with natural materials like bamboo flooring and rattan furniture would further enhance the cooling effect and contribute to the overall tropical minimalist aesthetic.

    Space Planning and Functionality

    Filipino lamudi minimalist

    Tropical minimalist design prioritizes functionality and comfort within the constraints of hot and humid climates. Effective space planning is crucial for maximizing natural resources while maintaining a sense of openness and ease. This involves strategically leveraging natural light and airflow to mitigate the effects of heat and humidity, creating a naturally cooled and well-ventilated living space. Careful consideration of furniture selection and arrangement is also paramount to ensure efficient use of space and to enhance the overall aesthetic.

    Maximizing Airflow and Natural Light

    The physics of heat transfer are fundamental to tropical minimalist design. Heat, primarily from solar radiation and ambient temperatures, needs to be dissipated efficiently. Maximizing natural light and airflow directly addresses this. Large windows, strategically positioned to catch prevailing breezes, allow for cross-ventilation, creating a natural cooling effect. High ceilings further enhance this effect by allowing hot air to rise and escape, reducing the need for energy-intensive air conditioning.

    Light-colored, highly reflective surfaces, both internally and externally, minimize heat absorption, keeping the interior cooler. The design should incorporate elements that strategically channel and distribute these natural resources, creating a comfortable microclimate within the home. For instance, strategically placed louvers or jalousies allow for adjustable light and ventilation control, preventing direct sunlight while permitting airflow.

    Space-Saving Furniture and Storage Solutions

    In smaller homes common in hotter climates, space-saving furniture is essential. Multifunctional pieces, such as sofa beds that convert into sleeping spaces or ottomans with built-in storage, are ideal. Wall-mounted shelves and foldable tables maximize vertical space, minimizing floor clutter. Modular furniture, easily reconfigured to suit different needs, offers flexibility and adaptability. Built-in storage solutions, such as closets and cupboards, seamlessly integrate with the architecture, eliminating the need for bulky standalone units.

    Lightweight materials such as bamboo and rattan are preferred for their breathability and ease of movement, further enhancing the sense of spaciousness. For example, a cleverly designed Murphy bed can disappear into a wall, transforming a living room into a bedroom in seconds.

    Integration of Indoor-Outdoor Living Spaces

    Blurring the boundaries between indoor and outdoor spaces is a defining characteristic of tropical minimalist design. Verandas, patios, and open-air courtyards extend the living area, creating a seamless transition between the interior and the exterior environment. This not only increases the overall usable space but also promotes natural ventilation and cooling. The use of permeable materials, such as screens or latticework, allows for visual connectivity while providing privacy and shade.

    Strategically placed plants and water features further enhance the cooling effect and create a calming, tranquil atmosphere. This design strategy leverages the natural beauty of the surrounding environment, enhancing the sense of spaciousness and connection with nature. For example, a large sliding glass door can seamlessly connect a living room to a shaded patio, effectively doubling the living area.

    Essential Furniture for a Tropical Minimalist Living Room

    The selection of furniture for a tropical minimalist living room emphasizes functionality and simplicity. The goal is to create a space that is both aesthetically pleasing and conducive to relaxation and comfort. The materials used should be durable, lightweight, and ideally sourced sustainably.

    • Modular Sofa: A modular sofa offers flexibility in arrangement and can be easily reconfigured to suit different needs. Materials like rattan or sustainably sourced teak offer both durability and breathability.
    • Lightweight Coffee Table: A simple coffee table made from bamboo or recycled wood provides a surface for drinks and other items. Its lightness allows for easy movement and rearrangement.
    • Wall-Mounted Shelves: Wall-mounted shelves maximize vertical space and provide storage for books, decorative items, or other essentials. They contribute to a clean, uncluttered look.
    • Rattan Armchairs: Lightweight and breathable rattan armchairs offer comfortable seating. Their natural texture adds to the overall tropical aesthetic.
    • Floor Lamp: A simple floor lamp provides ambient lighting, enhancing the atmosphere and reducing the need for overhead lighting during the day.

    Lighting and Ventilation Strategies

    Mk27 notranji fachadas interiorzine polkna eno vrtom microperforado contemporary prostori

    Harnessing natural forces is paramount in tropical minimalist design, mitigating the need for energy-intensive cooling systems. Effective ventilation and strategically implemented lighting significantly impact thermal comfort and energy efficiency, creating a sustainable and pleasant living environment. This section details how these strategies contribute to a healthier and more comfortable home in hot climates.

    Natural ventilation, the process of using natural airflow to cool a building, plays a crucial role in thermal comfort in tropical regions. The principle is based on the physics of convection: warm air rises, creating a pressure difference that draws in cooler air from outside. This natural airflow reduces the reliance on air conditioning, lowering energy consumption and minimizing environmental impact.

    Studies have shown that well-ventilated buildings can experience a significant reduction in indoor temperatures, leading to improved occupant well-being and reduced energy costs. For example, a study conducted by the University of California, Berkeley, demonstrated a 10-15% reduction in energy consumption in buildings with optimized natural ventilation systems compared to those relying solely on mechanical cooling.

    Window Types and Airflow Optimization

    Window design is crucial for maximizing natural ventilation and daylight. Different window types offer varying levels of airflow and light penetration. The selection should consider factors such as prevailing wind direction, solar orientation, and privacy requirements. High-performance windows with low-E coatings can reduce solar heat gain while maintaining transparency. Strategically placing operable windows, such as casement or awning windows, on opposite sides of a room facilitates the stack effect, drawing cool air in from one side and expelling warm air from the other.

    In contrast, fixed windows, while providing natural light, contribute less to ventilation. Consider incorporating louvered windows for enhanced control over airflow and sunlight penetration.

    Strategic Fan Placement and Cooling Enhancement

    Ceiling fans and strategically placed portable fans can significantly enhance the effectiveness of natural ventilation. Ceiling fans create air circulation, drawing cooler air upwards and distributing it more evenly throughout the room. This effect is particularly noticeable when coupled with operable windows. Portable fans can be strategically positioned to direct airflow towards occupants, creating a localized cooling effect. The use of fans reduces the perceived air temperature, making the environment feel cooler even without a significant drop in actual temperature.

    Studies have shown that even a gentle breeze from a fan can improve thermal comfort, allowing for a higher acceptable indoor temperature.

    Kitchen Lighting Design: Balancing Natural and Artificial Light

    A well-designed kitchen lighting scheme in a tropical minimalist home balances natural light with artificial sources to create a functional and aesthetically pleasing space. Maximizing natural light during the day reduces the need for artificial lighting, saving energy and promoting a connection with the outdoors. Large windows and skylights, when appropriately shaded to prevent excessive heat gain, are ideal for this purpose.

    Artificial lighting should complement natural light, providing sufficient illumination for tasks such as food preparation and cleaning. Consider using energy-efficient LED lights with adjustable brightness and color temperature to create a versatile and adaptable lighting environment. Recessed lighting, under-cabinet lighting, and pendant lights can be strategically placed to highlight specific areas and create a layered lighting effect.

    For example, using warm-toned LED lights in the dining area and cool-toned lights for task-oriented areas can enhance the ambiance and functionality of the space.

    Landscaping and Exterior Design

    Landscaping plays a crucial role in mitigating the effects of intense tropical heat while simultaneously enhancing the aesthetic appeal of a minimalist home. Strategic plant selection, shading techniques, and material choices can significantly reduce energy consumption and create a comfortable, visually stunning outdoor environment. This section details the principles and practices of effective landscaping for tropical minimalist homes.The primary function of landscaping in hot climates is to moderate temperature fluctuations and reduce solar heat gain.

    This is achieved through a combination of shading, evapotranspiration (the process where plants release water vapor), and the albedo effect (the reflectivity of surfaces). By carefully choosing plant species and strategically positioning them, one can create a microclimate that is significantly cooler than the surrounding area.

    Drought-Resistant Plants for Hot Climates

    Many plants thrive in hot, dry conditions and require minimal watering once established. Selecting these drought-tolerant species reduces water consumption and maintenance demands, aligning with the principles of sustainable design. Examples include: Cordyline fruticosa (Ti plant), known for its vibrant foliage and tolerance to drought; Pandanus species (screw pines), offering architectural interest and requiring minimal upkeep; and various succulents such as Agave and Aloe, which store water in their leaves and require infrequent watering.

    These plants, chosen for their resilience and visual appeal, contribute to a low-maintenance yet visually rich landscape.

    Shaded Areas and Pergolas in Outdoor Spaces

    The creation of shaded areas is paramount in mitigating the harsh effects of tropical sun. Pergolas, constructed from durable, locally sourced materials such as treated timber or sustainably harvested bamboo, provide a shaded framework for seating areas and walkways. These structures not only reduce direct sunlight but also create a sense of enclosure and intimacy, enhancing the overall ambiance of the outdoor space.

    Strategically placed shade sails or retractable awnings offer additional flexibility, allowing for adjustable shading levels throughout the day. The integration of these elements provides respite from the heat and encourages outdoor living.

    Tropical Minimalist Garden Design

    Imagine a garden bathed in dappled sunlight, where the sleek lines of a minimalist home are mirrored in the carefully curated landscape. The garden is predominantly composed of drought-tolerant plants, their colors echoing the muted palette of the house. A central pathway, paved with smooth, light-colored stones, winds through the space, leading to a shaded seating area nestled beneath a pergola crafted from dark stained bamboo. Tall Cordyline fruticosa plants, with their deep burgundy leaves, stand sentinel at either end of the pathway, providing a vertical accent. Clusters of Pandanus plants offer textural contrast with their spiky leaves, while strategically placed succulents add pops of color and form. The overall effect is one of serene simplicity, a harmonious blend of natural elements and architectural design.

    A small, reflecting pool, lined with dark grey volcanic rock, adds a sense of tranquility and helps to cool the microclimate. The plants are spaced to allow for air circulation, minimizing humidity. The minimalist design allows the natural beauty of the selected plants to shine. The overall feel is one of calm sophistication, a haven of peace amidst the tropical heat.

    Conclusion

    Tropical minimalism for hot climates

    In conclusion, tropical minimalism offers a compelling model for sustainable and comfortable living in hot climates. By embracing natural materials, maximizing airflow and natural light, and thoughtfully integrating indoor and outdoor spaces, we can create homes that are both aesthetically pleasing and environmentally responsible. The key lies in understanding the interplay between design principles and the scientific realities of thermal comfort.

    Through careful consideration of material selection, color palettes, and spatial organization, we can harness the power of nature to create havens of coolness and tranquility, even in the most challenging climates. The resulting spaces are not merely houses, but rather, an embodiment of harmonious coexistence between human design and the natural world.

    Query Resolution

    What are some disadvantages of tropical minimalism?

    While offering many benefits, tropical minimalism might require more maintenance for natural materials like bamboo or rattan. The reliance on natural light and ventilation could also limit privacy in some situations. Furthermore, finding specific materials locally might be challenging in certain regions.

    How does tropical minimalism differ from other sustainable design styles?

    While sharing the sustainability focus of other styles, tropical minimalism specifically addresses the unique challenges of hot and humid climates. It emphasizes natural ventilation and light more explicitly than other sustainable designs which might focus on insulation or energy-efficient appliances as primary strategies.

    Can tropical minimalist principles be applied to apartments or smaller spaces?

    Absolutely. The principles of maximizing airflow, using light colors, and selecting space-saving furniture are highly adaptable to smaller spaces. Clever storage solutions and multifunctional furniture are key to success in this context.

    Are there any specific pest control considerations for tropical minimalist homes?

    Yes, using natural materials increases the potential for pest infestation. Regular inspection and proactive pest control measures, including natural repellents, are crucial. Choosing pest-resistant materials when possible is also advisable.